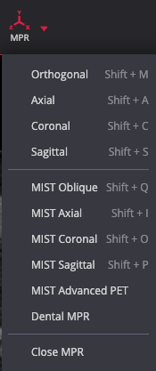
The MPR feature allows custom cross-sectional views to be made at any angle and apply projection modes like MIP, MinIP, and Average.
Tips for Using the Oblique MIST Tool
1. Select a Series

- Tip: First set the viewport layout to 1x1
Choose a series to work with (e.g., thin-slice axial CT).
2. Activate MPR Mode
- Navigate to the toolbar menu and select MPR > MIST Oblique
- Shortcut: Press
Shift + Qto activate quickly. - The system will preload the selected series to cache the data locally.

3. Adjust the Image Plane Orientation
- Select a plane: Click on the desired plane in the viewer.

- Manipulate crosshairs: Drag, angle, or rotate the crosshairs to adjust the image plane orientation. This enables cross-sectional views at any angle.
- Set slice thickness: Adjust using the slide bar or select from the menu at the bottom of the viewport.
4. Choose Projection Type
-
-
- Maximum Intensity Projection (MIP): Displays the highest intensity values in the dataset. Ideal for vascular imaging, such as CT angiography.
 Minimum Intensity Projection (MinIP): Highlights the lowest intensity values, useful for air-filled structures like the lungs.
- Average Projection (AVG): Computes the average intensity across a defined plane thickness, offering a balanced view of tissue densities.
-
5. Toggle and Display Viewport Options

Toggle the MPR layout display via the viewport side menu options.
Tip: Click Close MPR to exit back to the main viewer.
