The members section displays all current repository members along with their roles and site affiliations, and allows for adding new members. The permissions assigned to each role dictate the level of access that each member has within the repository.

Repository members section view
Objectives
To understand the criteria for determining who should be a repository member and have access to repository features. Learn how to effectively add, configure, and edit a member within the repository.
Repository Membership Permissions

Configurable permissions for a role with repository scope
Roles with repository scope can be configured for deep administrative power over the repository and its projects. Thus, a person should be a repository member only if they require any of the below permissions.
Having the ability to view, edit, delete, or approve:
- The repository itself
- Repository member
- Role
- Site
- Form
- Tool
- Audit log
For all projects within the repository, having the ability to view, edit, delete or approve:
- Project
- Pipeline
- Member
- Result
- Subject
- Event
- Project site
- Audit log
Repository Member vs Project Member Permissions
Members who do not need extensive administrative capabilities—such as those working on a specific project within the repository or completing tasks from a task list—are instead advised to be added as project members with permissions on project level, rather than as repository members with repository level permissions. You can learn more on how to add members with project level permissions here.
👉 The repository permissions apply to all projects within the repository and take precedence over project permissions.
How to Add and Configure Repository Member(s)
To be able to add and configure new repository members, you must have Repository member: View and Edit permissions activated for your role. You can find out more about roles and permissions here.
For a user with correct permissions, please follow these steps:
- Navigate to the repository
- Navigate to the Members Section in the leftmost toolbar
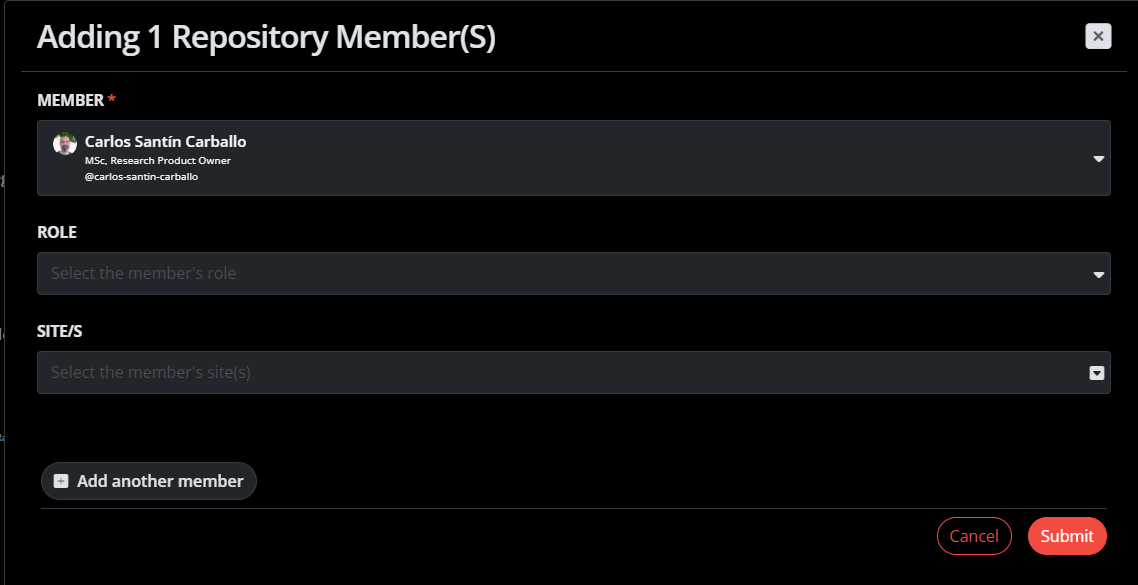
- Click on "Add repository member" in the upper rightmost corner (see image below). You can add members with or without an existing CMRAD account to the repository.

- To add an existing platform user, enter the user's name and assign to a repository role and optionally select one or more sites. The user will receive an invitation email to the repository - see below.
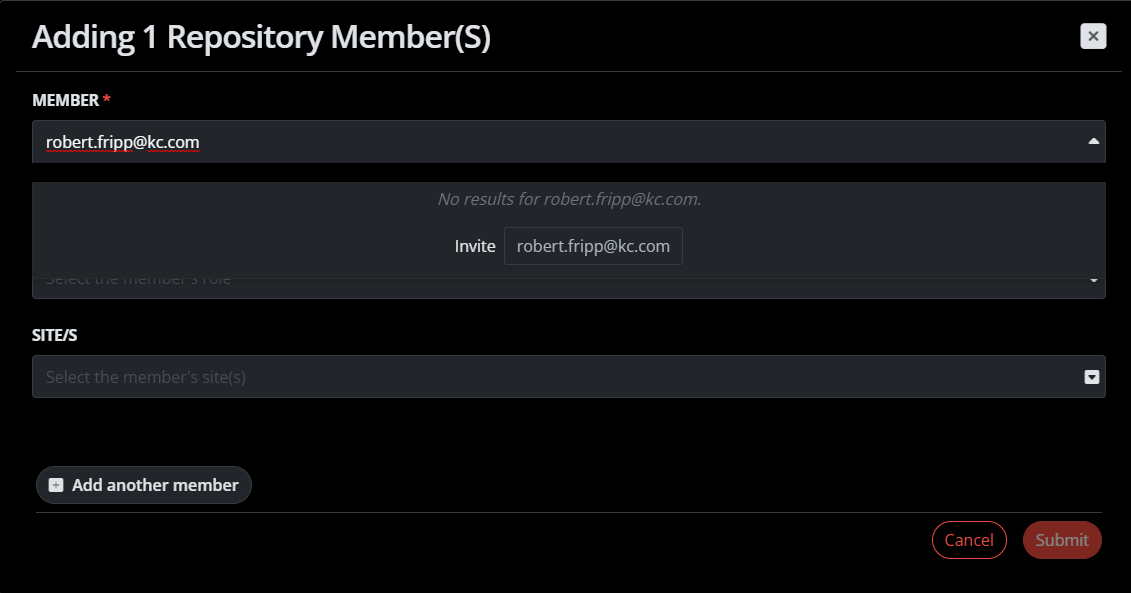
- To add a new platform user, enter the users's email. An "Invite" button will appear, prompting you to enter the new users Name, Last Name, assign a repository role, and optionally select one or more sites. The user will receive an invitation email to the platform - see below.
- Multiple members can be added at the same time by pressing the "Add another member" button.
- The new repository member will initially be in a pending approval state, indicated by the
 symbol (see image below), and need to be approved by a another repository member with Repository Member: Member Approval permissions to get access to the repository.
![]()
👉 The new member will only be able to view the repository once they have received approval from an existing repository member.
How a New Repository Member Can Access to the Repository
When a new platform user is invited from the repository or project and approved, they will receive two invitation emails in parallel. To get access to the repository, they need to follow the below steps in given order to access the repository. A platform user with an existing account can jump directly to step 2.
1. Activate the new CMRAD account by pressing the link in the email inviting them to the Collective Minds Platform, and setting and saving a password when prompted.

2. Access the specific repository and/or project by pressing the link in the email inviting them to the repository/project.

3. The user can also navigate to the repository directly from the main page, by pressing the "Workspace" dropdown list (see image below). They will find the new repository listed under "RESEARCH".

How to Manage Repository Members

Various actions for managing repository members are available. The actions are affiliated with different Repository member permissions, as detailed below.
The following actions can be executed by users with Repository member: Edit permissions:
 Edit member: change the role or change/add/remove site(s) for the member. The changes will require another approval by a repository member. A member with changes pending approval will be marked with a . The changes to be approved to the role or associated site/s can be seen in the members table, but are not effective until the approval is done, i.e. when the has been replaced by a
  .
. Re-send invitation: the email invitation and link to the repository/project can be re-sent at any time by pressing the "Re-send invitation" button in the member actions.
 Copy Invitation link: Allows you to copy the invitation link to the clipboard, enabling you to share it through various means such as email.
The following actions can be executed by members with Repository member: Delete permissions:
 Delete member A member can be removed from the project prior to being approved, by a member with delete member permissions
The following actions can be executed by members with Repository member: Member Approval permissions:
 Approving a member: Before a new member is added or any changes to existing members' roles/sites are made, approval from a repository member with the appropriate permissions is required.
 De-activate/activate member: the member can be de-activated from the repository at any time by another repository member with Member Approval permission. This can be done by pressing the "De-activate member" button in the member actions. When a member is in de-activated status can be activated again by pressing the "Activate member" button.
👉 Once a member has been approved, they cannot be removed from the project. Instead, you can de-activate them using the deactivation function.
How to Filter the Repository Members List
For a more effective member management, remember also that the filter section in the right can be used to filter out project members according to their status. This can be helpful in repositories with many members of different roles.

The filtering option in the repository members list